This section shows how to create a table definition using fields already defined in the Repository.
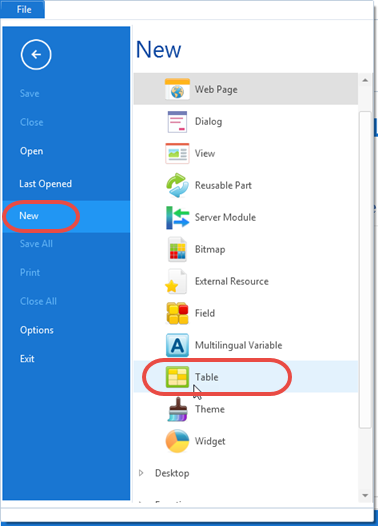
1. Select New -> Table from the File menu:
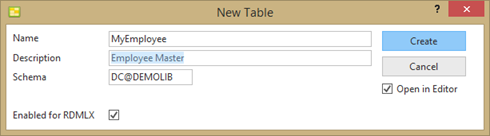
2. Enter a Name and Description for the table:
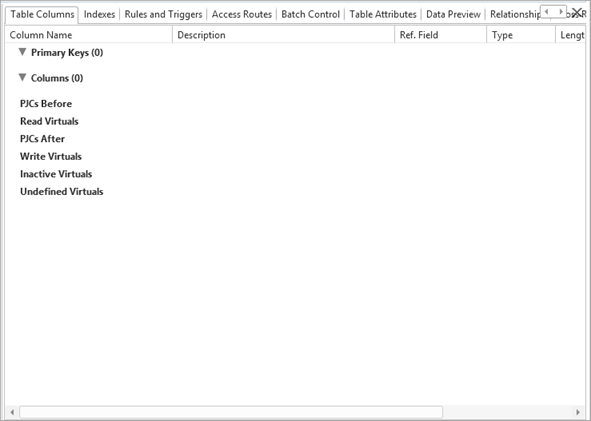
3. The new table definition is opened in the editor showing the empty Table Columns tab:
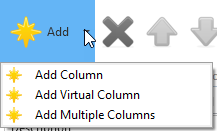
4. There are three Add columns options from the Add menu on the Home ribbon:
|
Add Column |
Add a single column. |
|
Add Virtual Column |
Add a single virtual column. |
|
Add Multiple Columns |
Display the Add Columns dialog in which you can add real and virtual columns based on existing field definitions, or by defining new field definitions . |
Alternatively you can drag fields from the Repository tab (or another tab such as Favorites / Last Opened) onto the Table Columns tab, or drag columns from an existing Repository defined table onto the Table Columns tab.
5. You will initially use the Add Multiple Columns dialog, adding fields which are already defined in the Repository. Note that if you type a value into the Column Name, autocomplete finds the matching field name.
6. Add the following columns by typing them into Column Name. Be sure to stop typing and press Enter when autocomplete has found the required field:
o xEmployeeIndentification
o xEmployeeTitle
o xEmployeeSurname
o xEmployeeGivenNames
Make xEmployeeIdentification the Key. Your dialog should look like the following:

Description, Type, Length and Decs have been completed from the Repository field definitions.
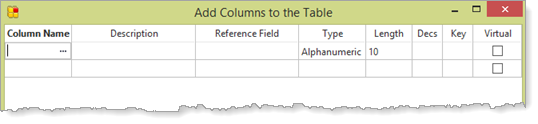
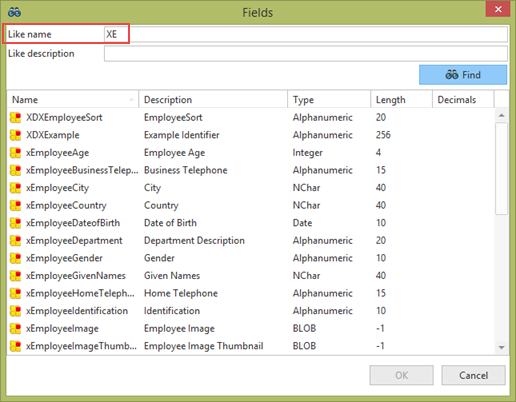
7. Position in the next Column Name row and click the ellipsis button to open the Find Fields dialog. Enter xe in Like Name and click the Find button.
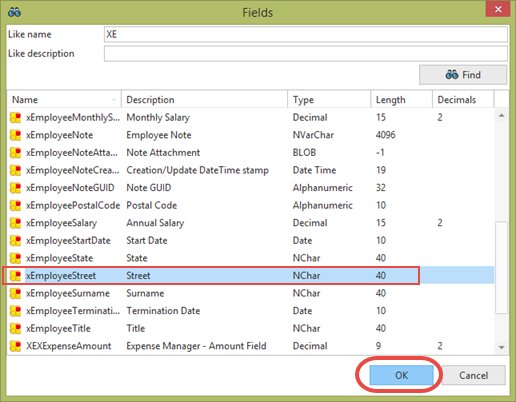
8. Scroll down to find field xEmployeeStreet, select it and click OK to define this column:
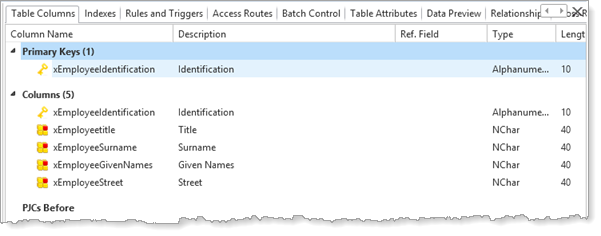
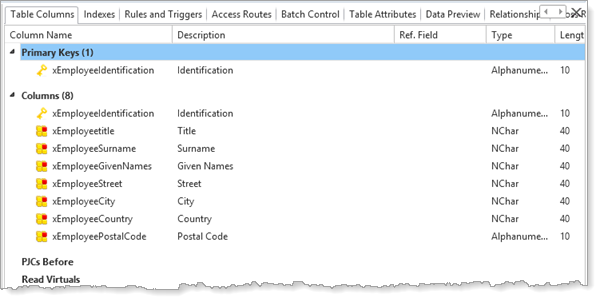
9. Click OK in the Add Columns to the Table dialog. Your Table Columns tab should now look like the following:
10. Next add fields by dragging them from the Repository tab. Select the Repository tab, expand the Fields group and then expand fields beginning X. Using the Control key, select the fields xEmployeeCity, xEmployeeCountry and xEmployeePostalCode.
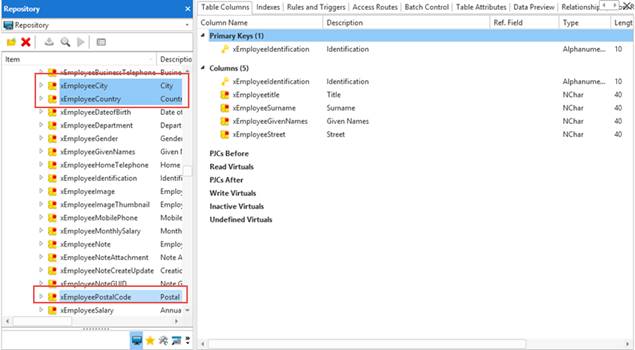
Drag them onto the Table Columns tab, positioning the cursor below xEmployeeStreet, before releasing the left mouse button. Your Table Columns tab should look like this:
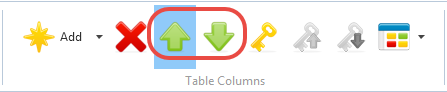
Note: You can change the sequence of columns by selecting a column and using Up and Down green arrows on the toolbar:
11. Next add columns by dragging them from an existing table.
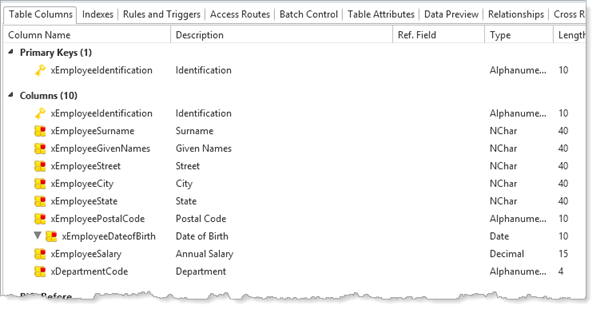
On the Repository tab, expand the Tables group to locate xEmployee table. Expand the definition of the table, and drag columns xEmployeeDateofBirth, xEmployeeSalary and xDepartmentCode onto the Table Columns tab, below xEmployeePostalCode.
Your table definition should now look like this:
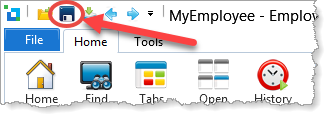
12. Save the Table definition using the Quick Access toolbar.
13. Display the Compile Options dialog:
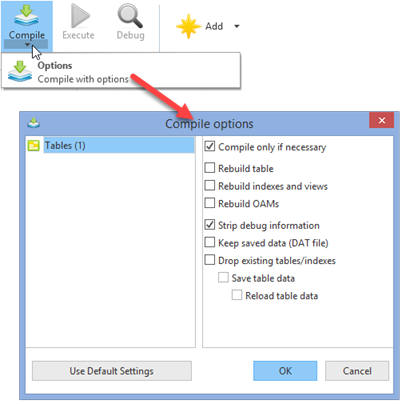
The Compile only if necessary check box should be selected. For a new or changed table definition, the compile will then build the table, indexes and the OAM.
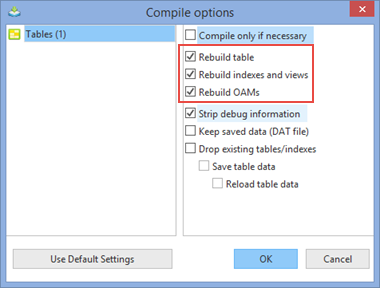
To control the build options yourself, you could also use these options:
Important Note: The Compile Options used will be remembered, and will apply to the next Table compile.
14. The Compile log is displayed on the Compile tab:

15. Double clicking on the Compile log entry on the Compile tab, displays the Compile Output details:
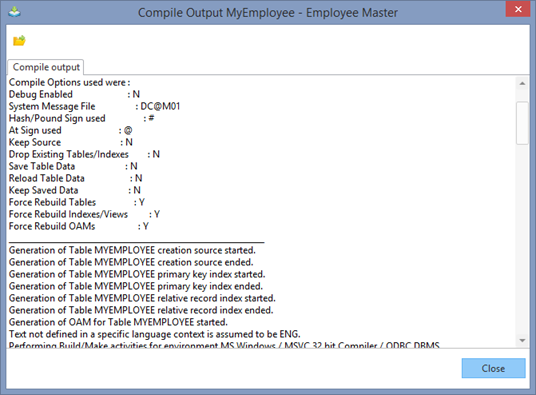
You would normally only refer to the detailed log if the compile failed.
Note that you can also create tables by copying existing tables. See Copy Tables.